Reversing embedded device bootloader (U-Boot) - p.2
This blog post is not intended to be a “101” ARM firmware reverse-engineering tutorial or a guide to attacking a specific IoT device. The goal is to share our experience and, why not, perhaps save you some precious hours and headaches.
Sum up
The first post dealt with some more theoretical aspects at a very low level, instead this one will show how we finally decrypted the kernel image. DO NOT PANIC - we will not be as long-winded as in the first post. 😇
In case you missed the first post, make sure to check it out: https://www.shielder.com/blog/2022/03/reversing-embedded-device-bootloader-u-boot-p.1/
Before jumping in the main topic, let’s see a picture about how the decryption of the kernel works.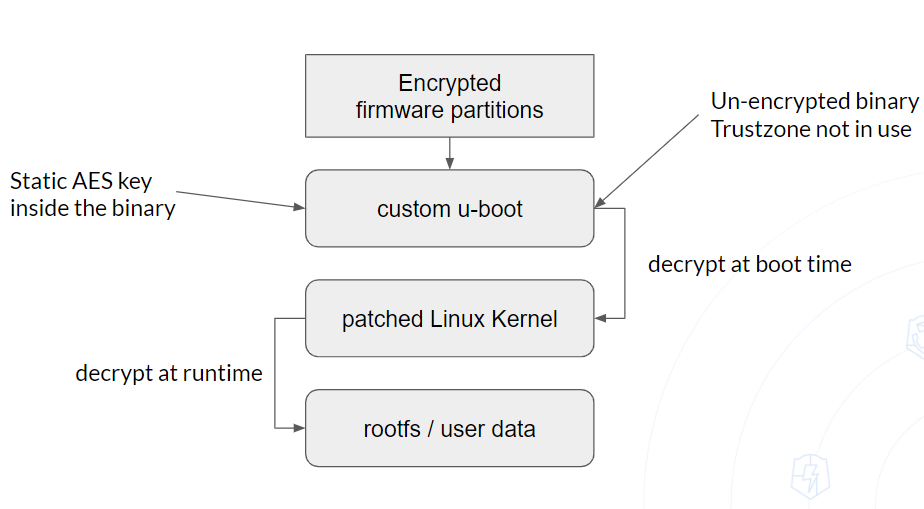
It’s a 🐴… It’s a 🦏… It’s 🦄!
Unicorn is a lightweight multi-platform, multi-architecture CPU emulator framework. Unicorn web site
Unicorn uses the CPU emulation component of QEMU (with many changes to adapt to the project’s design needs) but has a big difference as it only emulates CPU operations but do not handle other parts of system like QEMU does. Therefore, the engine can emulate all the instructions that QEMU can, but beyond that, Unicorn’s strengths lie in other places. Unicorn is a Framework, and it offers easy ways to extend its features and build tools on top of it. It is flexible and can emulate raw code without context. Unicorn is lightweight compared to QEMU because it is stripped of all the subsystems that do not involve CPU emulation. Finally, choosing QEMU or Unicorn really depends on the goal you want to achieve and the information / pre-requirements you have.
Why and How
After reversing a large part of the custom decrypt function in the U-Boot binary, we decided it would be easier to emulate the binary and let it decrypt the kernel for us.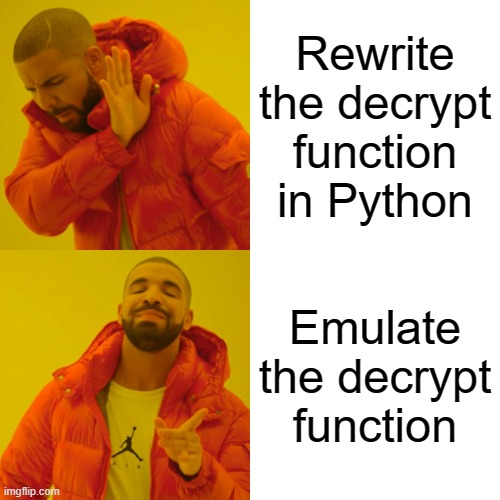
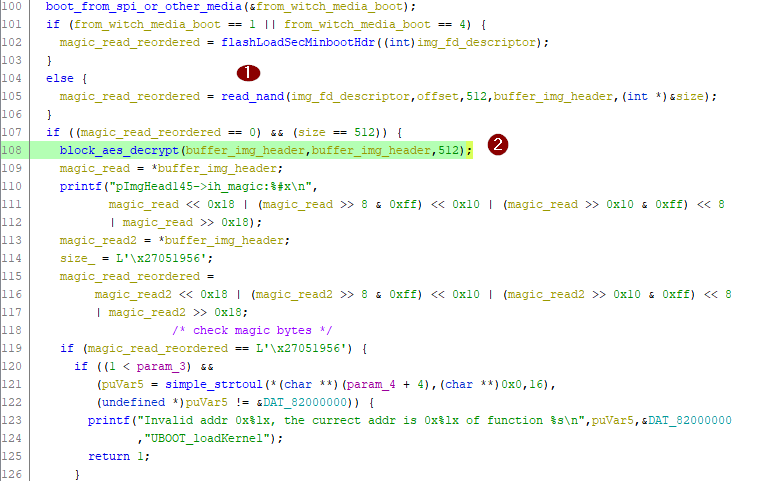
At line 108 the decrypt function uses two pointers, the first points to a memory region where the content of the encrypted file is stored, while the second points to a memory region where the decrypted file will be stored. There is also a third parameter indicating how many bytes should be read.
We know thanks to our reverse engineering efforts that the AES key is hard-coded in the U-Boot binary and that all the key derivation functions are within the block_aes_decrypt function.
We could therefore speculate that the decryption could be performed without using any information coming from external devices, meaning that the content of U-Boot itself and the file to be decrypted are enough.
Finally, we just need to run a piece of assembly and read / write some memory - what’s better than Unicorn to do that? 🦄
What follows is a comments-enriched snipped of code based on Unicorn and Capstone which we built to emulate U-Boot and decrypt the kernel.
| |
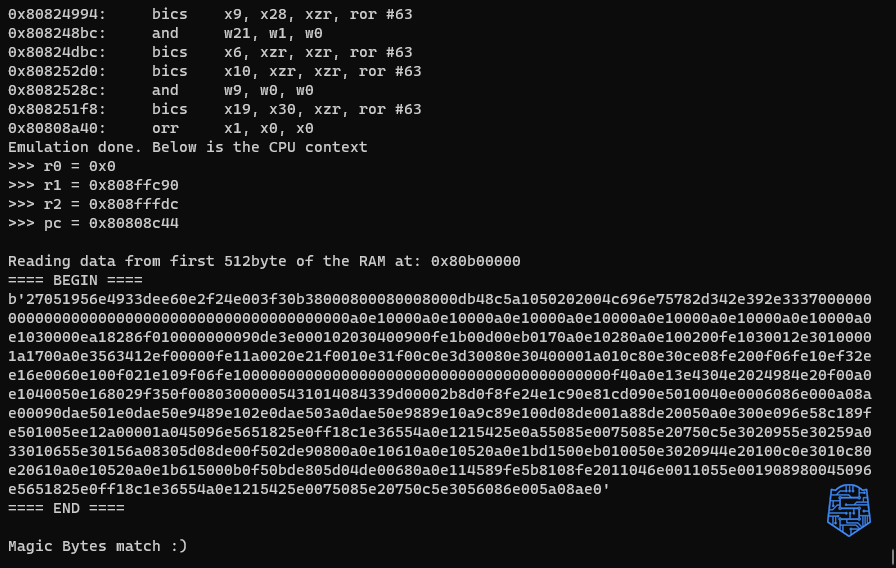
NOTE: The script is just a Proof-of-Concept to decrypt the first 512 bytes of the kernel.
Wrapping it up - at line 76 we specify the instruction address from which start the execution (ADDRESS+0x8c40) and the one (ADDRESS+0x8c44) where the execution should end. Those addresses are related to the block_aes_decrypt function, which is the actual function we want to call to decrypt the kernel.
In the following image it is more clear what the addresses are pointing to.
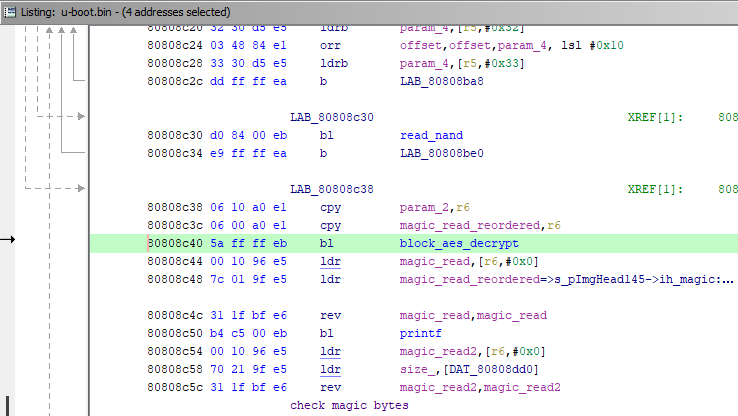
We start the execution right before the branch to block_aes_decrypt. We also configure the first three ARM arguments registers, r0 which points to the encrypted kernel, r1 which point to the memory region where we write the decrypted kernel, and r2 which is the size to be read / written. Finally, we stop the emulation right after the ret as do not need anything else to be executed, and we want to avoid that the decrypted kernel gets overwritten.
You can’t use Qiling
In December 2021, we were interviewed by one of Qiling/Unicorn’s leading developers, @kj.xwings.l.
ICYMI: https://www.youtube.com/watch?v=14NQJkvR_gU
As you can imagine from the interview, QilingLab, and the WIP QilingLab2, we are fans of the Qiling project, so why didn’t we use it?🧐
The answer is pretty straightforward, Qiling did not support running bare metal binaries when we tried it in late 2021. We were sure it was just a loader issue though, as the core of Qiling is Unicorn we knew it was possible to implement such feature. This is where @TheZero shown his coding skills and implemented the primitives for bare metal binary emulation in Qiling. By a funny not-so-funny coincidence, someone else tried to fill this Qiling gap and did a PR a few days after we managed to get a working PoC but before our patch was ready to be committed.
NOTE: The PR from @CQ didn’t get merged, but @xwings and @CQ himself later introduced the feature with other commits (e.g. this one).
RAW Bin again 😔
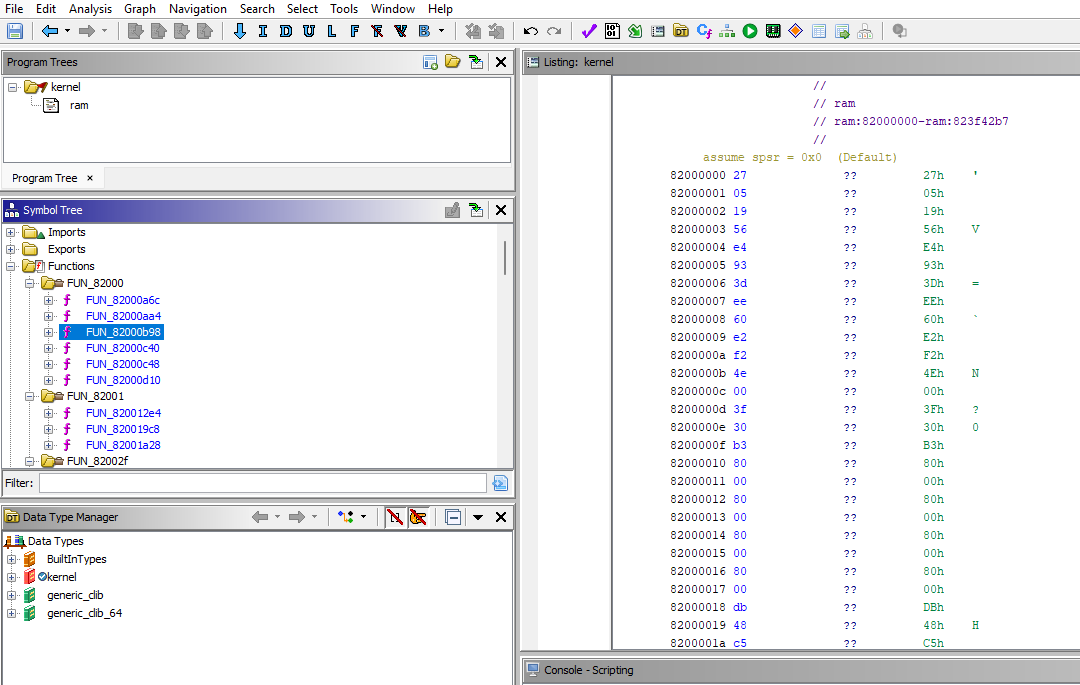
So now that we have obtained our kernel from the encrypted image, we could load it in Ghidra and start reverse engineering it. Unforunately, Ghidra detected the kernel as a RAW binary and the output of the automatic analysis was simply a mess.
Convert RAW kernel bin to ELF
Luckily for us, an open-source tool came in handy in this case.
vmlinux-to-elf allows to obtain a fully analyzable .ELF file from a vmlinux/vmlinuz/bzImage/zImage kernel image (either a raw binary blob or a preexisting but stripped .ELF file), with recovered function and variable symbols. GitHub repo
NOTE: If you want to learn mode about the process check out the explanation in the project README.md, it is really fascinating.
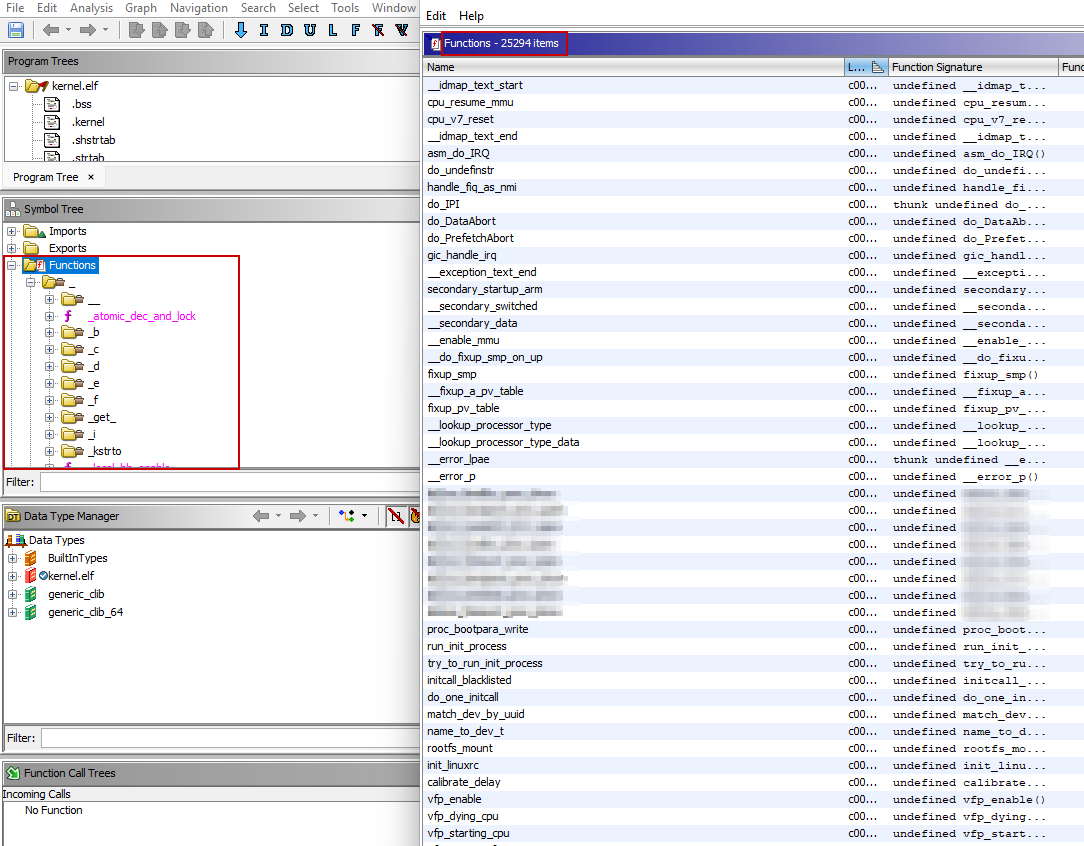
WAAAYY BETTER!
Conclusion
As we don’t want to show off also the kernel reversing process (it’s out of the scope of this post series) it’s time to wrap everything up.
The journey has not been straightforward, and we faced various difficulties, but it was a great opportunity to lean about how a bootloader works, how to reverse bare-metal binaries, how to emulate them, … YOU NEVER STOP LEARNING!
This post series has been possible thanks to the Research Time which Shielder grants to its employees. Do you like pwning hardware and embedded systems while researching new vulnerability classes? Drop us your CV!
Pitch Time 🗣️
Create a secure IoT device is hard, isn’t it?
Shielder could help you into verifying the security of your hardware and firmware before you release your products on the market.
Check out our IoT Security services to learn more: https://www.shielder.it/services/iot-security/